Composing a coastal photograph with water, land and space
Give the sea a shape in the frame and let one detail establish the scale.
A coastal scene can become a picture of blue space with a thin strip of land. Give the photograph a stronger structure by deciding how the shore, horizon and foreground relate. Start from a safe public viewpoint, then make a few frames that explain the place at different scales.
Choose the relationship that matters
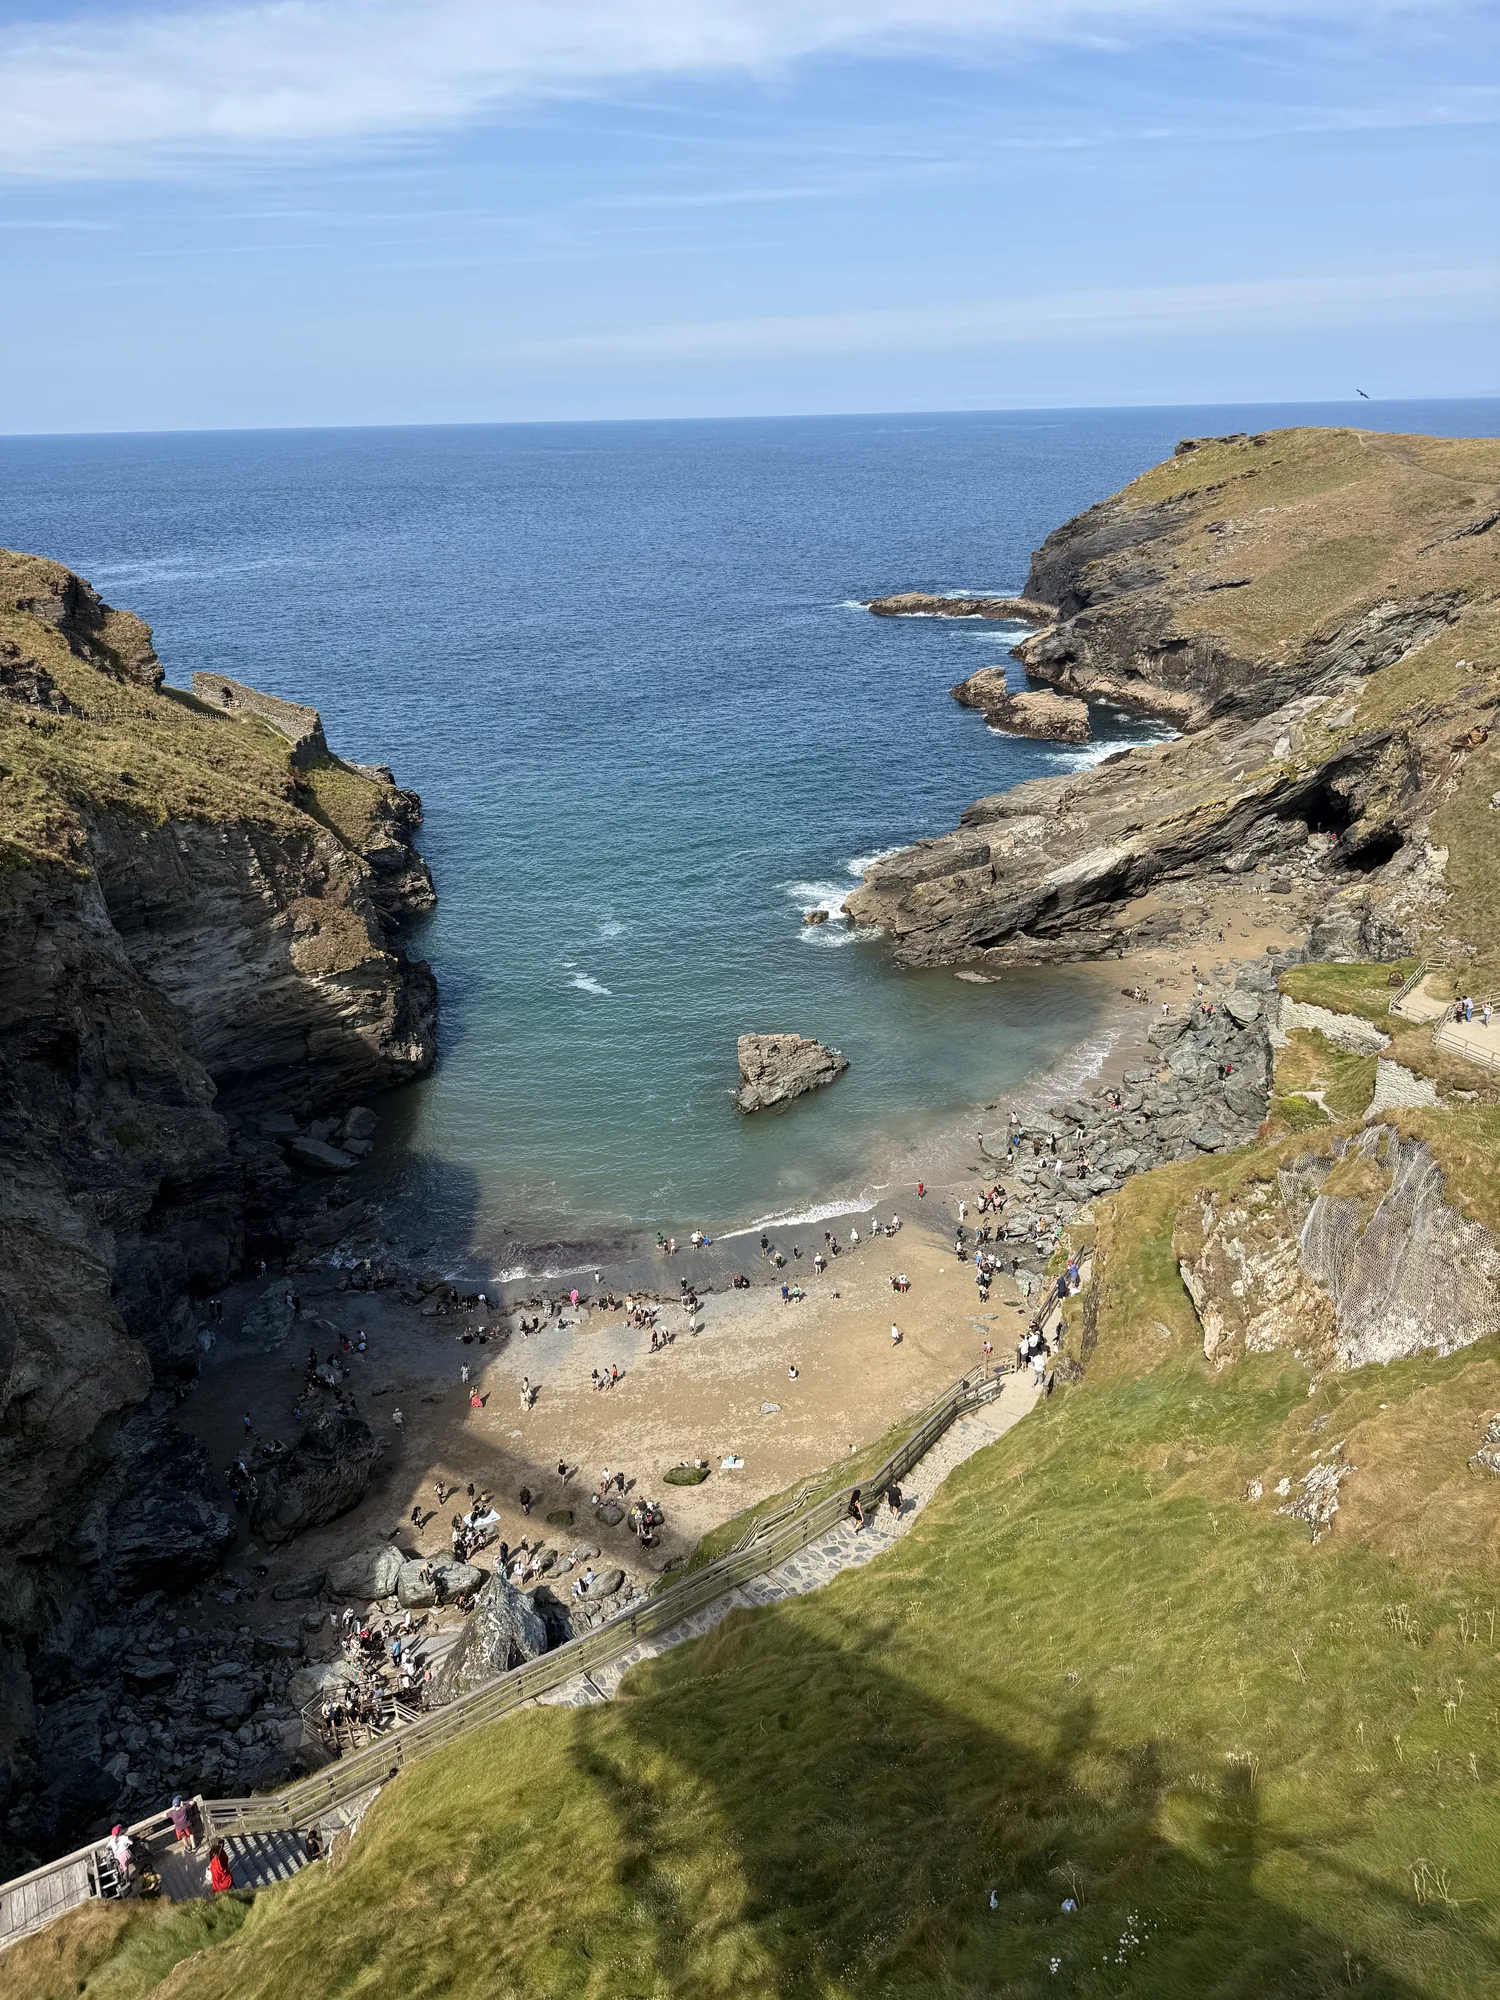
In the Cornwall cover photograph, steep land encloses pale water near the shore, with darker open sea beyond it. That relationship is the subject. The frame needs enough rock and water to make the shape of the cove readable, rather than the widest possible view in every direction.
At an open beach, the line of the sand may carry the photograph instead. Follow it through the frame and check where it ends. A curve often guides the eye more clearly than an empty foreground. You can use this without forcing a rule about always placing a horizon at one fixed height; decide according to what the land or sky contributes.
Use foreground when it explains your position
Grass, rock or sand can show where the photograph was made and give scale to open water. Include it when it has a useful shape or texture. A large dark rock that covers most of the image may add little, while a small patch of coastal grass can link the viewer to the path.
Check the frame’s corners for distractions before taking the picture. Keep the horizon deliberate, especially when the sea fills much of the scene. If a slope creates a strong diagonal, a straight horizon gives the image a stable reference. A wider frame can preserve that relationship better than a close crop made only to remove another visitor.
Vary scale rather than taking the same view again
Begin with the cove or bay as a whole, then choose a smaller element that belongs to it: a rock stack, the meeting of foam and sand or the surface of water in a sheltered part. Make the second frame different enough to contribute something new to the sequence.
If the light changes, repeat a composition only when the change matters. Cloud can reduce contrast, while low sun may pick out the cliff’s edges. Neither condition guarantees a better photograph. Compare what becomes clearer and what disappears, then choose a frame that carries the coast’s shape under the light you actually have.
Let the viewpoint set the limits
Stay on permitted routes and follow local barriers and cliff guidance. The Seven Sisters park advises keeping at least five metres from the cliff edge and base; other sites have their own instructions. A photograph’s composition should fit the safe standing place rather than requiring you to move closer to an exposed edge.
For a shore photograph, check tides, the available exit and sea conditions before walking around rocks. Keep equipment light enough to manage the return and protect it from sand and spray. If an angle is unavailable, use a longer view or find another permitted spot. A foreground plant is a reasonable part of the picture when removing it would require an unsuitable position.
A few useful answers
Should the horizon always sit on a third of the frame?
Use its position to give space to the part of the scene that matters. A fixed proportion is a starting exercise, not a requirement.
What should I do when the best angle is near a cliff edge?
Choose a safe permitted position and compose from there. Use a different frame or lens rather than moving closer to the edge.
Sources & visitor information
Destination information checked on 4 October 2026. Use the linked venue or authority for current access and booking details.
← More from the journal